This aint the best drawing in the world or best colouring job either but I figured I'd post up the process of it to show you how I tend to carry out drawing and colouring a piece. It was done for the
eclecticmicks blog.
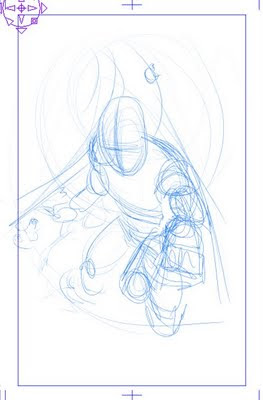
Step One:
For the thumbnail. Usually I turn the Cintiq sideways so its infront of me like a normal page and I really, really roughly throw down some lines to sketch out some sort of incling into the pose I'm gonna draw. Due to the wonders of the undo button I can draw as many lines as I like which helps remove and pen to paper anxieties that a lot of artists can get.
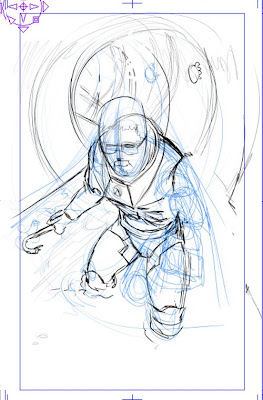
Step Two:
I then go over it a little more tightly, working out the anatomy or clothing or whatever the case may be. These lines are then turned into blueline aswell via the magic of Ctrl B. (These drawing stages are all done in Manga Studio by the way.)
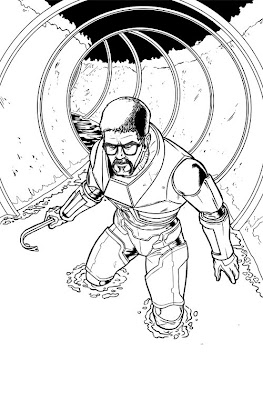
Step Three :
Here I draw the actual line art over the blueline. This stage is always by far the longest as its where the proper construction and refining are done. Notice, there isnt really a pencils stage in all this. Although you could call Step Two the pencils they would be considered highly loose. Again the benefits to digital are that when inking traditional, you have to be quite sure of the lines your putting down. Digitally you can be a lot more experimental at this stage as you are still working things out.
P.S. You can see I got lazy and never drew in the head crabs that were indicated in the background of the sewer pipe

Step four:
Turn off the blue line layers and tidy the line art up
Step Five:
Flats. Move over to Photoshop. Easily the most boring of all the parts, this is just separating the different colour blocks out from each other. I usually come up with a few colour choices at this stage and try to get a bit of a feel for the overall tone of the piece thats gonna be added in later.
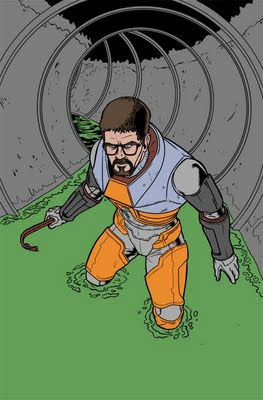
Step Six:
Rendering. Here I add in any shadows, highlights, reflections to the individual blocks of colour. Hopefully you can see much more form in the piece now from the last step. On second look I could have popped his arms more from the background here as you can see that after the textures are added they are lost a bit
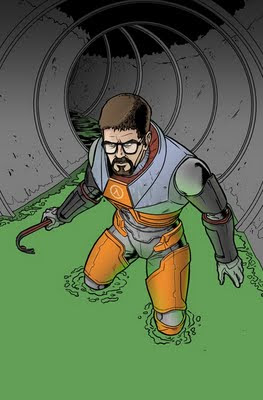
Step Seven:
Textures. This piece called out for a lot of textures. The Main ones being the Rusty Sewer, The Metal Hazard suit, The Fabric of the suit and the Water. Maybe the water effect isnt subtle enough but usually peoples eyes wont pick up the photographic look of it even when these types of textures are put in starker contrasting images. I do a lot of warps, perspective shifts etc to the textures to put them on the same plane as the objects they are applying too. For example, the rusty texture was pinched out a bit to make it look like its on a cylender.
Step 8: The final step then, which is quite small in this piece. I give the whole piece a colour overlay. In this example I used the green of the water, to give everything a tint of that colour, so the strong oranges of his suit arent too over saturated.
Step 9:
Sleep. For some reason its always late at night when I finish a colour job.


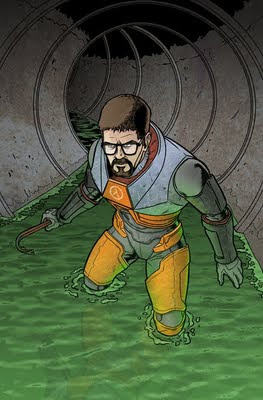
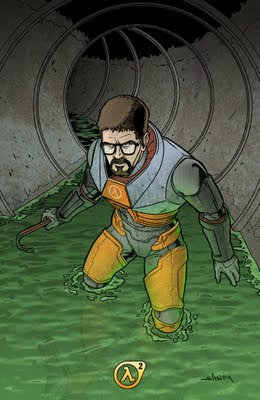
 Heres another Process piece. For some reason I seem to have lost the 2nd and third steps, but you can kind of see them behind the later pics.


 Step 9:


